×
- Live Chat
- 1-888-352-5786


My Garage
My Account
Cart
Genuine Lexus RX330 Drive Shaft
Axle Shaft- Select Vehicle by Model
- Select Vehicle by VIN
Select Vehicle by Model
orMake
Model
Year
Select Vehicle by VIN
For the most accurate results, select vehicle by your VIN (Vehicle Identification Number).
1 Drive Shaft found
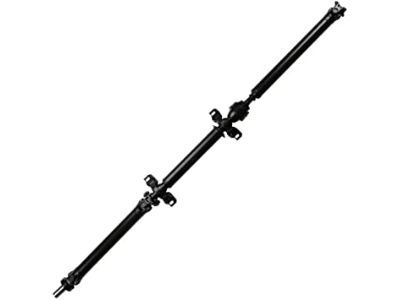
Lexus RX330 Shaft Assy, Propeller W/Center Bearing
Part Number: 37100-48020$859.67 MSRP: $1191.61You Save: $331.94 (28%)Ships in 1-2 Business Days
Lexus RX330 Drive Shaft
Should you need to purchase new auto parts for your vehicle, we strongly suggest you consider the genuine Lexus RX330 Drive Shaft available on LexusPartsNow.com. Our OEM Lexus RX330 Drive Shaft come with the reassurance of the manufacturer's warranty, a hassle-free return policy, and speedy delivery service, all at affordable prices online. Feel free to shop with confidence!
Lexus RX330 Drive Shaft Parts Questions & Experts Answers
- Q: How to check, removal and installation the driveshaft on Lexus RX330?A: To perform checks, first, raise the rear of the vehicle and ensure it's securely supported on jackstands. Look for any dents or cracks in the driveshaft tubing. Check for oil leakage at the connections to the transfer case and Differential. Rotate a rear wheel while inspecting the universal joints for proper operation, without binding, noise, or looseness. Listen for center bearing noise and check its rubber portion. You can also check the universal joints by attempting to twist them by hand or lifting the shaft. Any movement indicates wear. Tighten the driveshaft mounting bolts if needed. For removal and installation, repeat the step of raising and securing the vehicle. Make reference marks on the driveshaft and differential flanges for reinstallation alignment. Remove the rear universal joint bolts, then mark and unbolt the center support bearings. Pull out the front of the driveshaft from the transaxle. Lubricate the transfer case seal, guide the intermediate shaft yoke into the transfer case, and install the mounting bolts through the center support bearing. Reconnect the driveshaft to the pinion flange, align the marks, and tighten the fasteners. Reconnect the center support bearings, align the marks, and tighten the fasteners.

